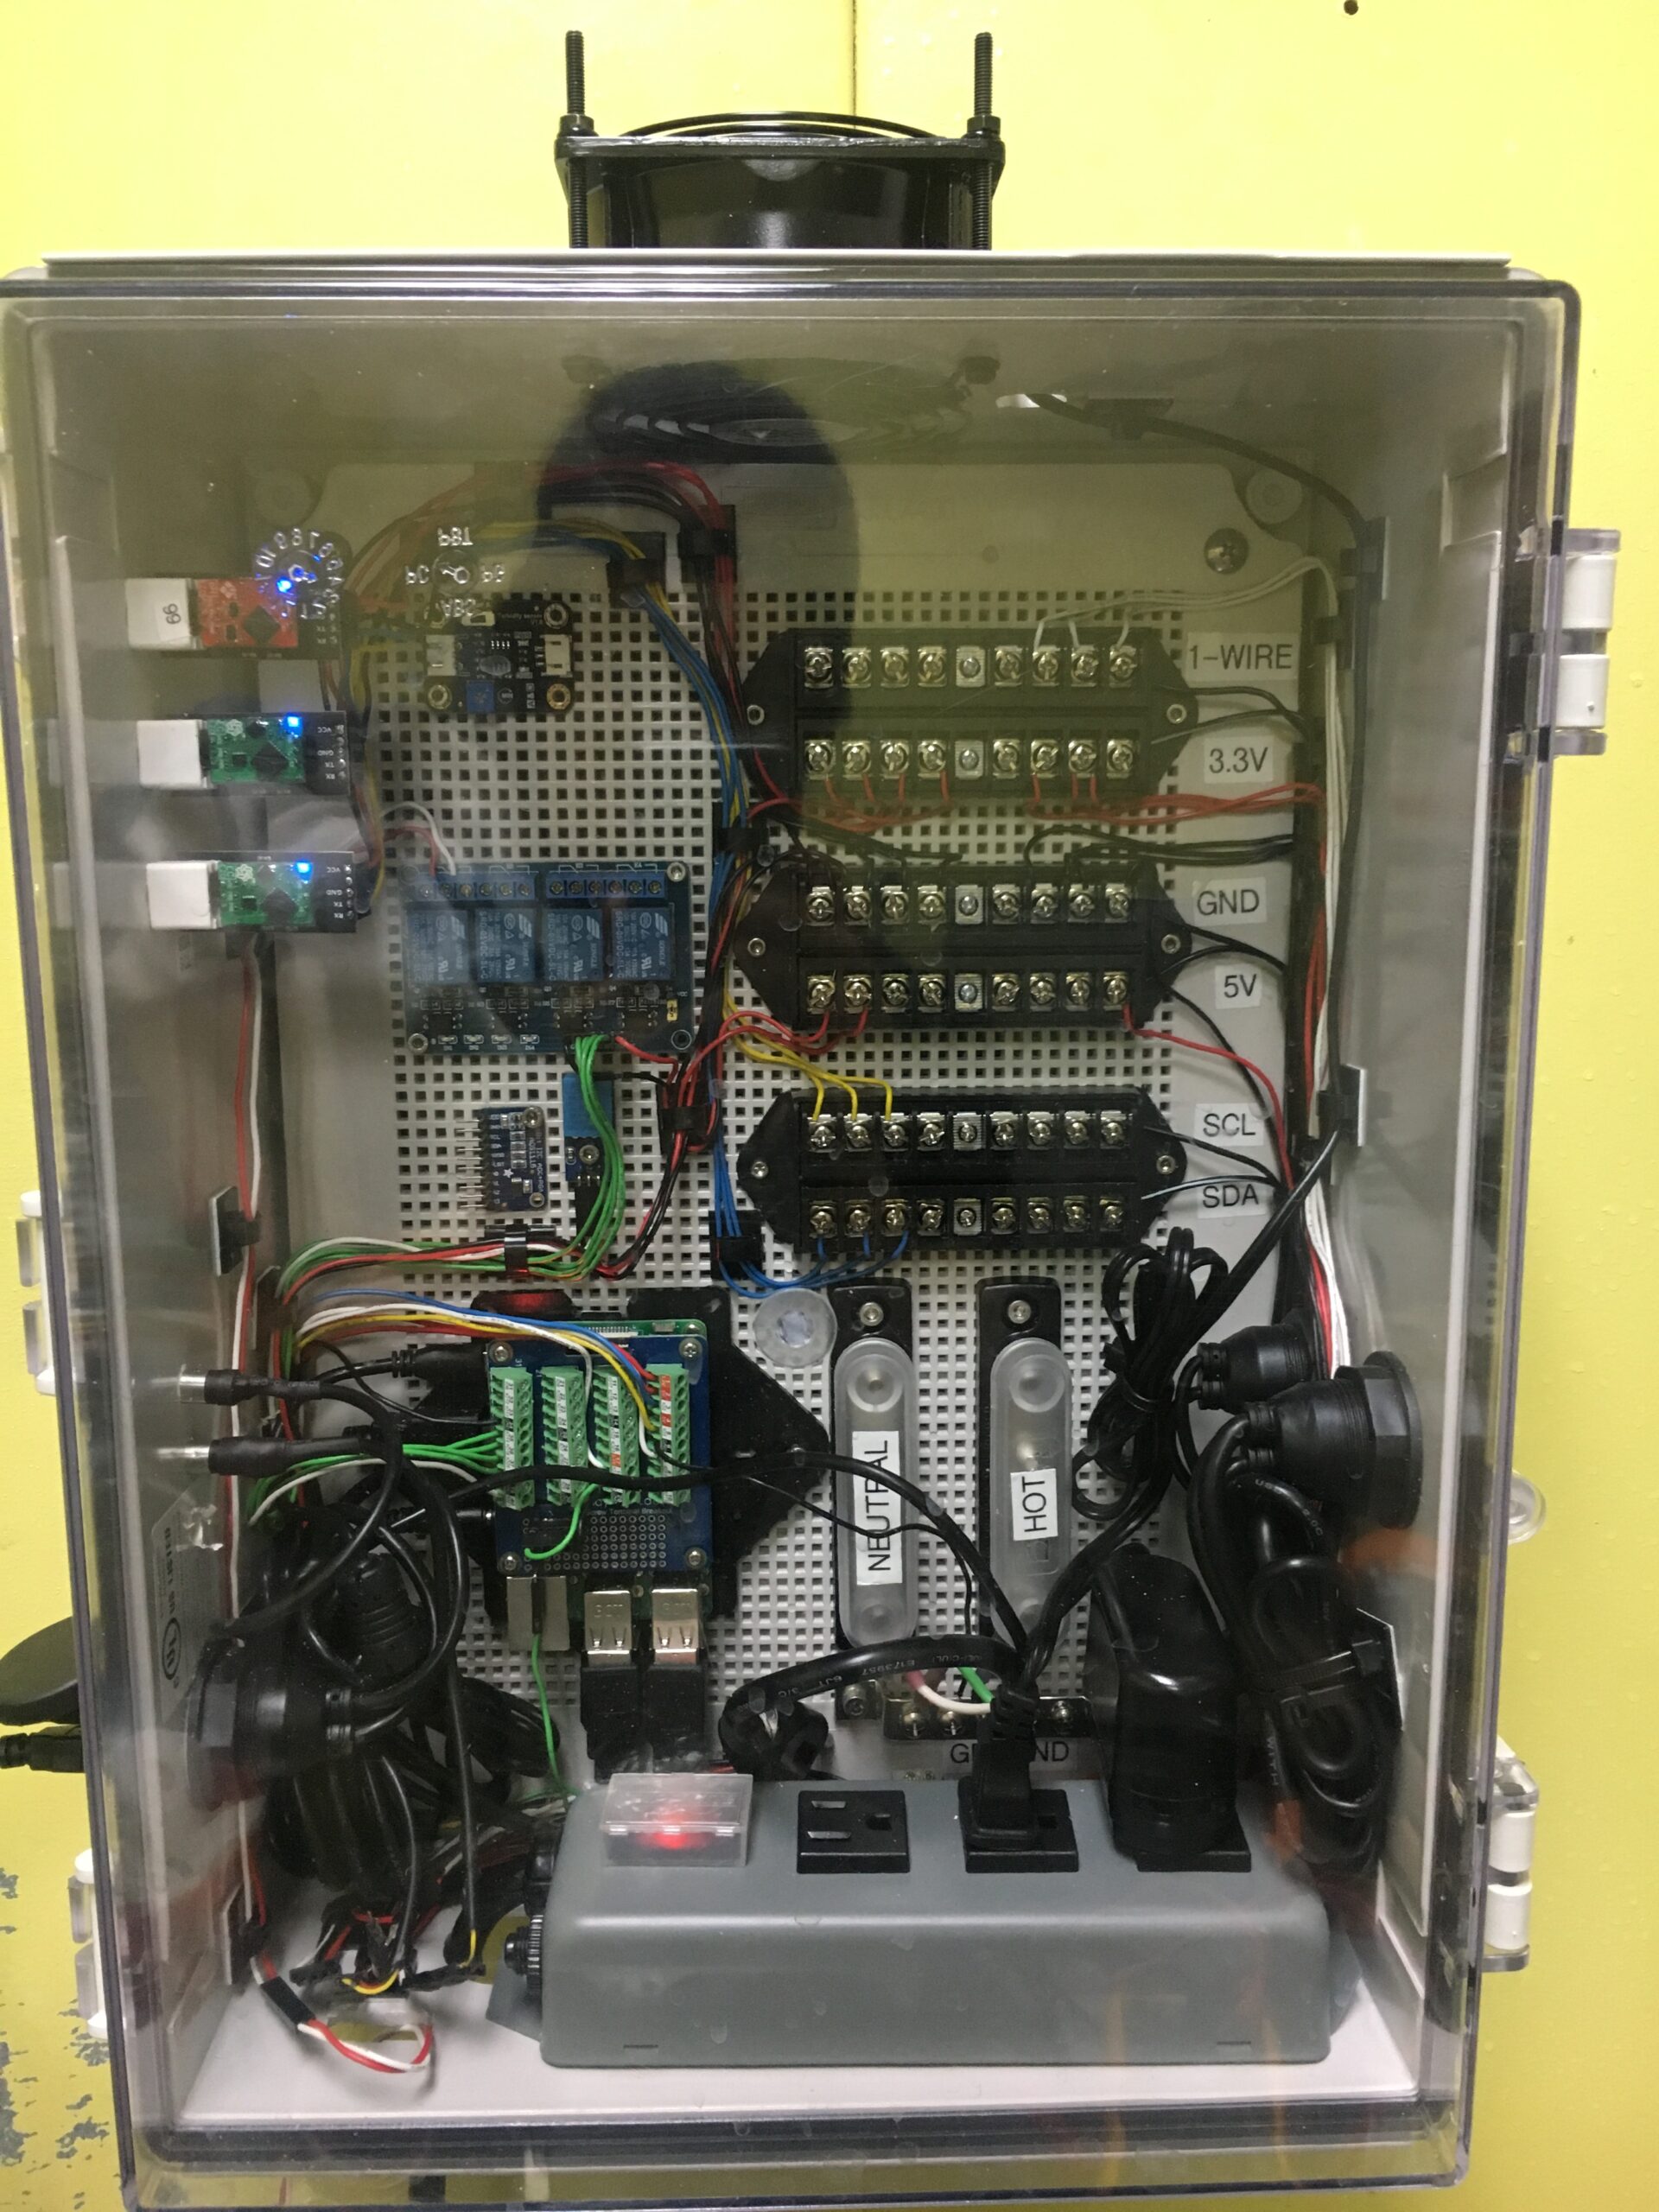
The picture above is of the finished product that has been functioning reliably for over a year!
This is a tutorial on the scale I made for my Raspberry Pi PLC for Membrane Filtration.
The idea of this scale came after my OpenCV flow meter began to stick due to the characteristics of the liquid we were filtering.
So in order to measure flow I decided to use a scale that would calculate the change in mass over time and using density I would then convert this to a volumetric flow rate. Since the range of flow I needed to measure was 0-50 mL/min a packaged flow sensor was out of the question.
All the flow sensors that were affordable were pulse based flow meters that had very high minimum flow rates and all the low flow rate flow meters were very pricey. Below I decided to include a comparison of a industrial low flow meter and my flow meter.
 |  | |
| Cole-Palmer Flowmeter | ESP8266+HX711+Scale | |
| Measurement Principle | Laminar Flow Element | Differential Mass |
| Price (USD) | $1470 (sensor) | $21.99 (Scale) $10.99 for 2 (ESP8266) $8.99 for 5 (HX711) |
| Power | 7-30V DC | 4.5V to 5.5V |
| Output | 0-5V, 4-20mA | I2C, SPI, UART, Serial (USB), MQTT Customizable with Additional Hardware |
| Range | 0 – 50 mL/min | 0.83 uL/min (as programmed) Variably set by changing rate change duration and load cell. |
| Resolution | 0.01 mL/min | 2 min (programmed) |
| Response Time | 20 msec | Variable dependent on resolution needed and load cell. |
| Measurement Unit | Volumetric | Mass |
| Temperature Compensation | Y (only for water) | No need, mass flowrate measured |
| Process Sensor Type | Inline | End of Line |
| Max Particulate Size | 20 um | No limit |
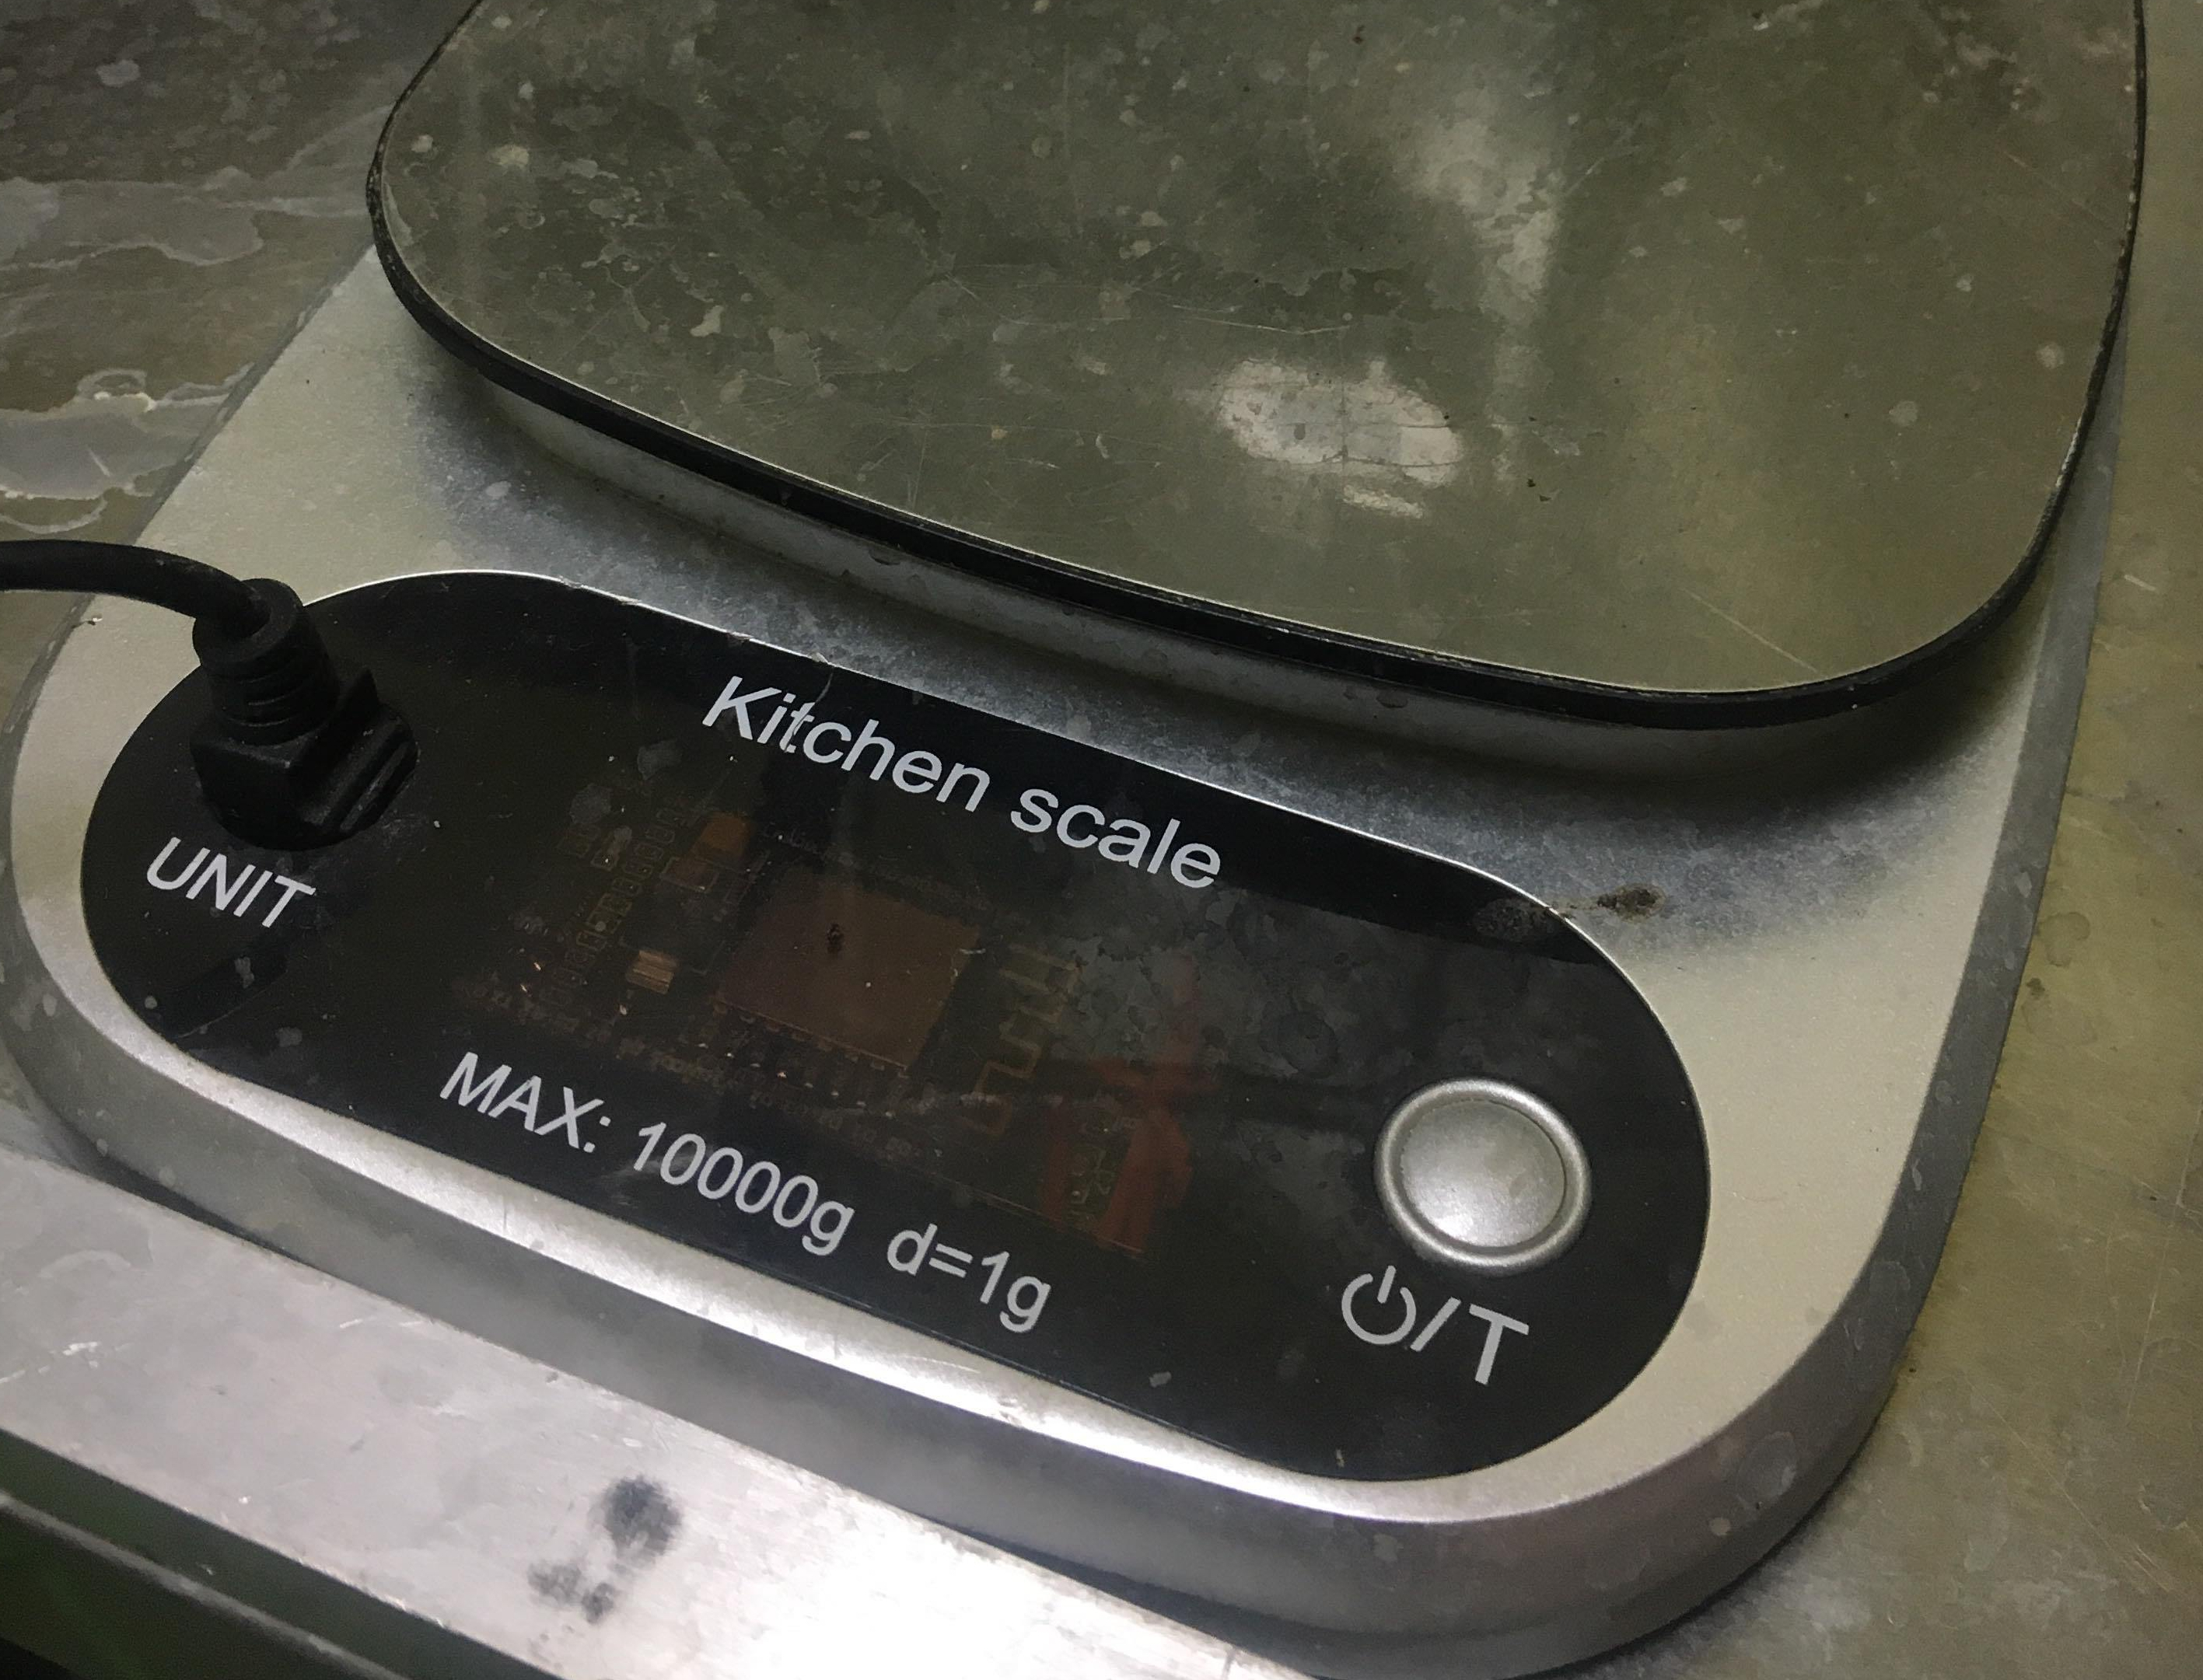
| Enclosure | Electronic : Plastic IP40 Wetted: 302, 303, 316L, Viton | Modified Kitchen Scale |
| Process Connections | Threaded: 1/8″ FNPT | Bucket |
| Customer Service | Y | You’re on your own! |
| Looks Professional | Y | N |
| Likelihood to Get Stolen | High | Very Low |
| Warranty | 1 Year | None |


After looking at that table its pretty clear that each sensor has its own applications. For measuring the flow rate of water coming out of a filtration unit I didn’t need a inline meter which makes things a lot easier. Also we run various types of liquids through our unit with various viscosity, and particulate sizes, most measurement techniques, including laminar flow element, simply cannot be accurate in various process scenarios without an extensive amount of calibrating. Except the coriolis mass flowmeter, man is that thing a feat of engineering, I was going to try to build one with consumer electronics for this project but I’ll save that for another project.
What you will need.


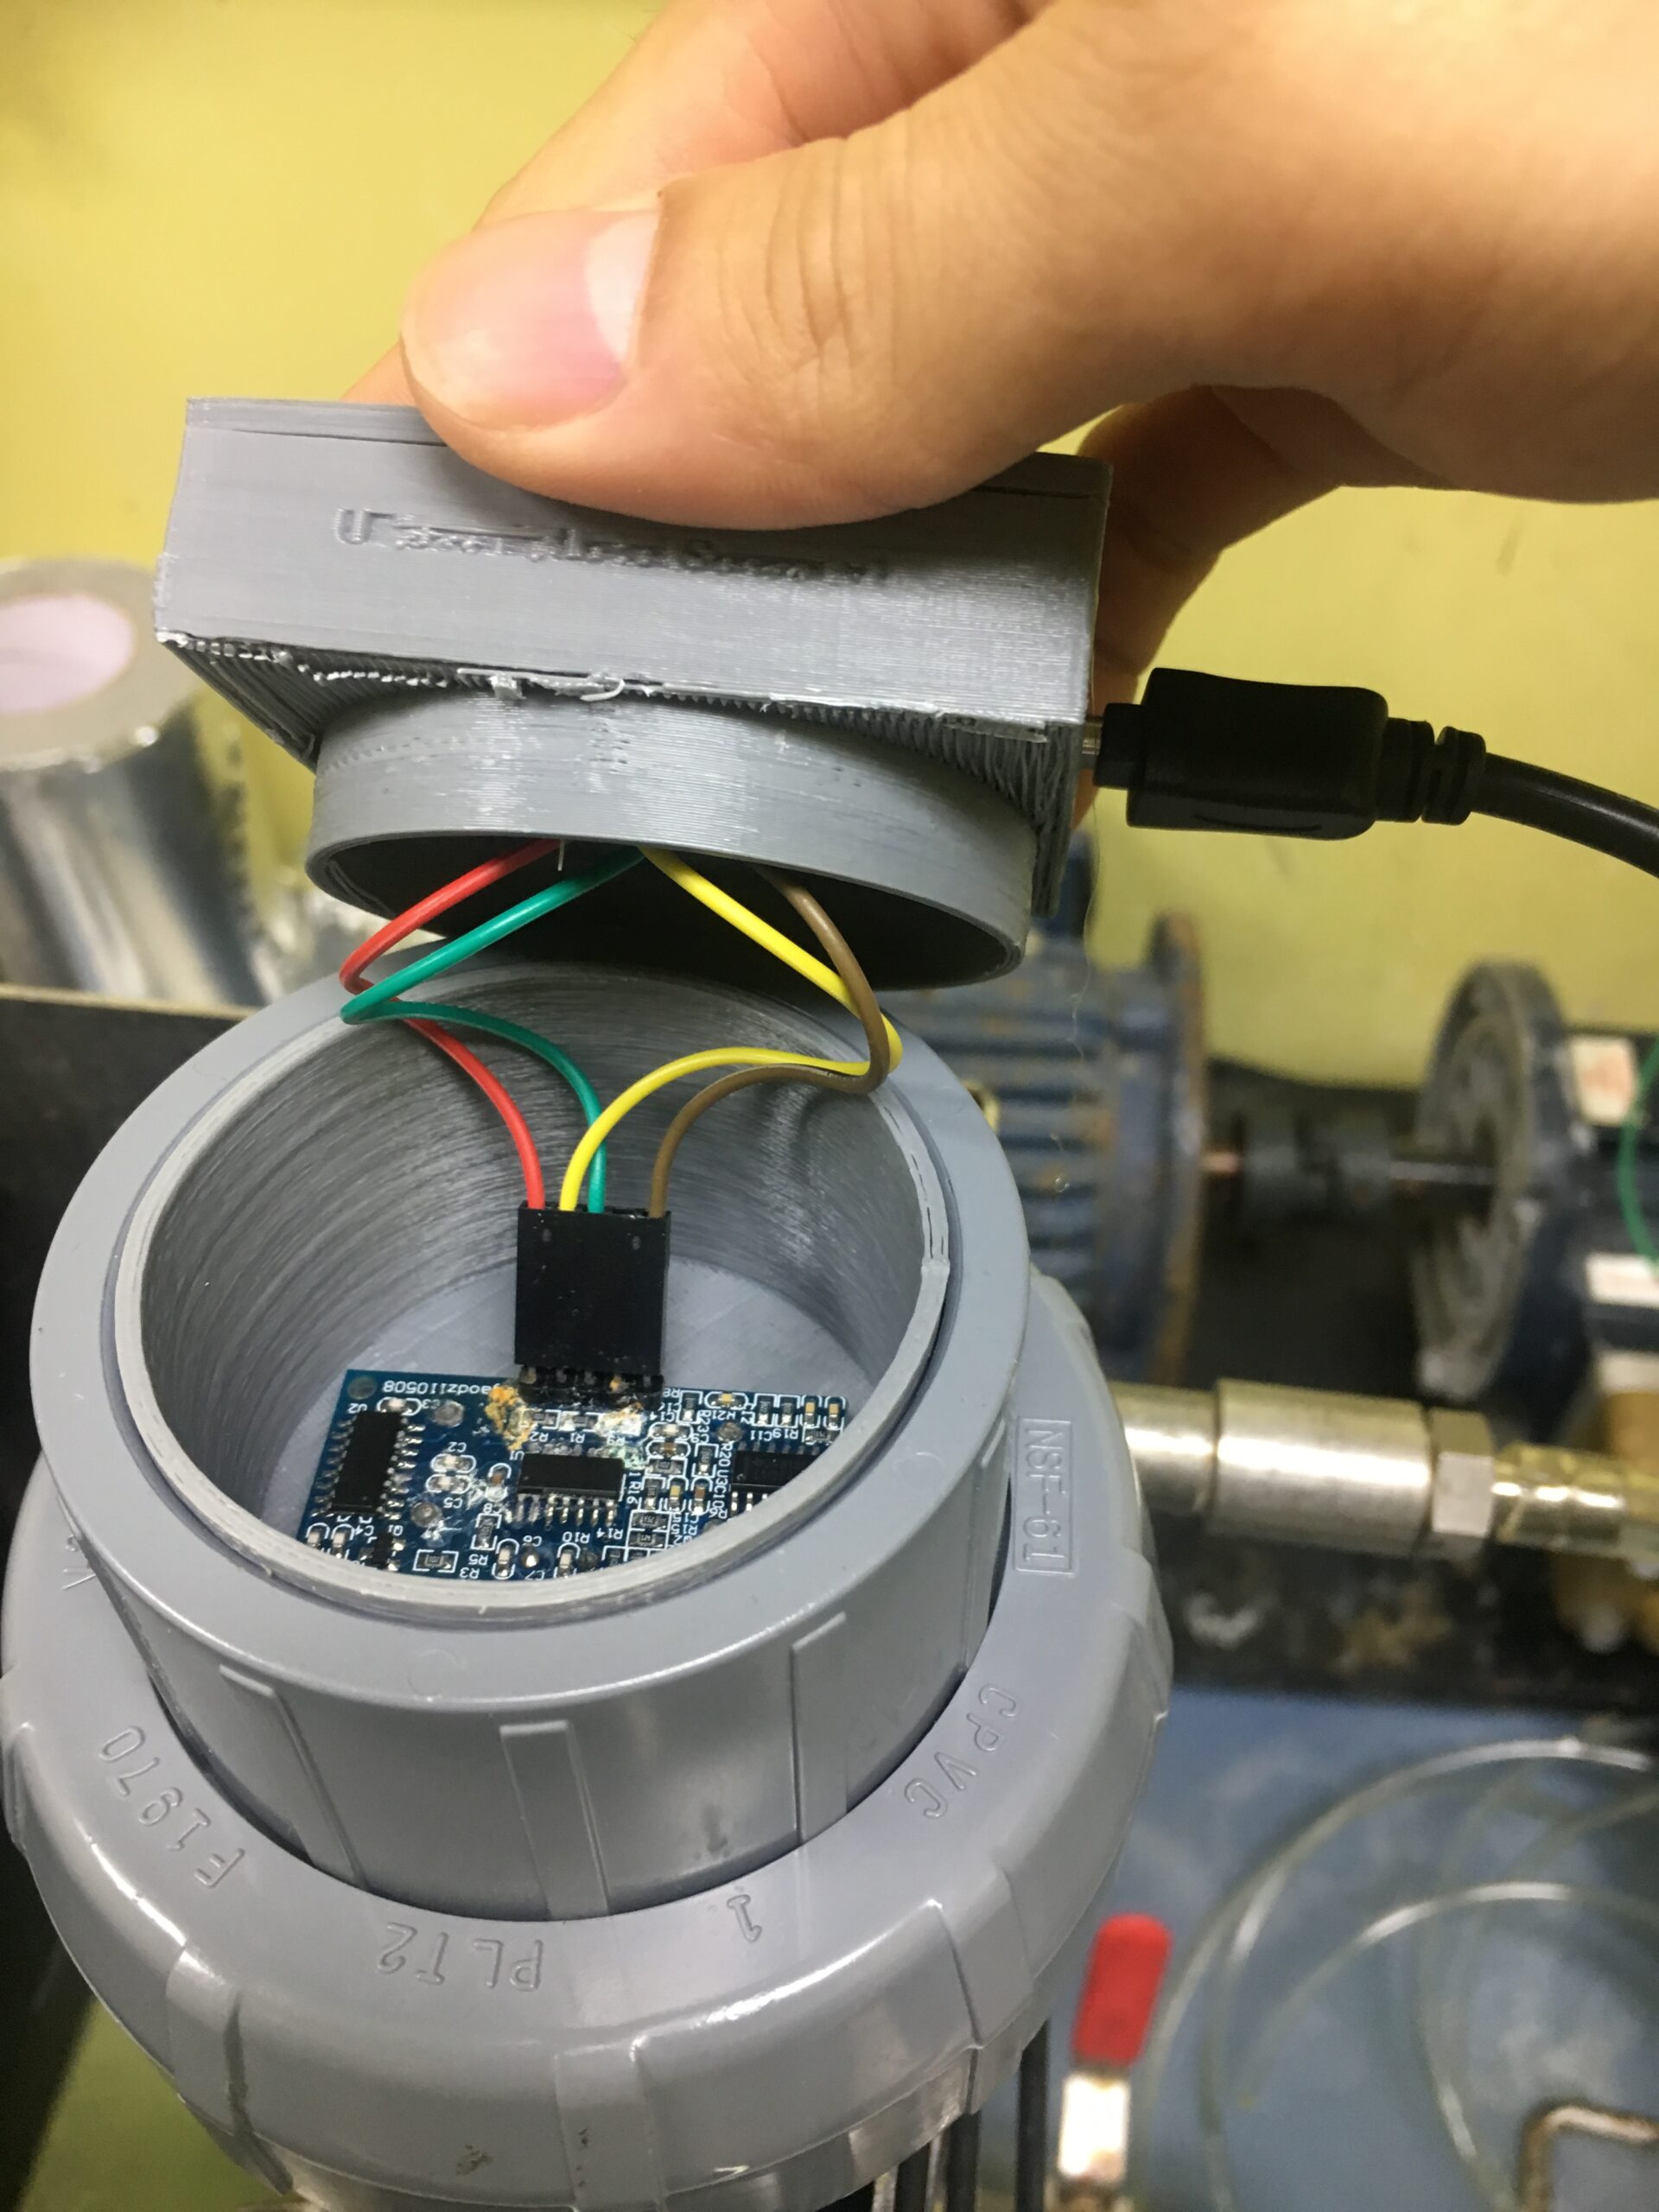
Instead of building my own scale with a load cell and a platform mounted to a base, I decided to purchase a perfectly functioning scale within the weight range I needed.
I wanted the freedom to position the scale where ever I needed and decided to go with a ESP8266 brain with MQTT communication to my Pi.
For those that do not know what MQTT is, it stands for Message Queuing Telemetry Transport. It is a messaging protocol that works on top the TCP/IP protocol, so if your device is connected on the same LAN or to a MQTT internet broker you can receive and publish light weight messages. This is extremely useful for IoT communications.
Pre-requisites
Install a MQTT Broker
Install and run your MQTT Broker, this will be the medium in which your scale sends its data and how your receiver receives its data.
There are many MQTT brokers out there and below is a link to the one I used.
After you download and run your broker, a MQTT server is now running on your host computer. The MQTT IP address will be the local IP address of the host computer and the port is defaulted to 1883
Install a MQTT Viewer
A MQTT viewer is the best way to debug and test the functionality of your MQTT messages to and from your device. I decided to use MQTT Spy. Below I have provided the git for MQTT-Spy.
Installing the EPS8266 Arduino add on
We will be programming the ESP8266 with Arduino IDE. In order to program and ESP8266 you must first install the add on into IDE. I have included below a link to a tutorial on how to install the add on.
ESP8266 Arduino Installation Tutorial
Install the HX711 Library
Thankfully there are people out there to write libraries to communicate with the HX711. The library allows you to use simple commands to control and communicate with the HX711. Below is the library I used for this particular project.
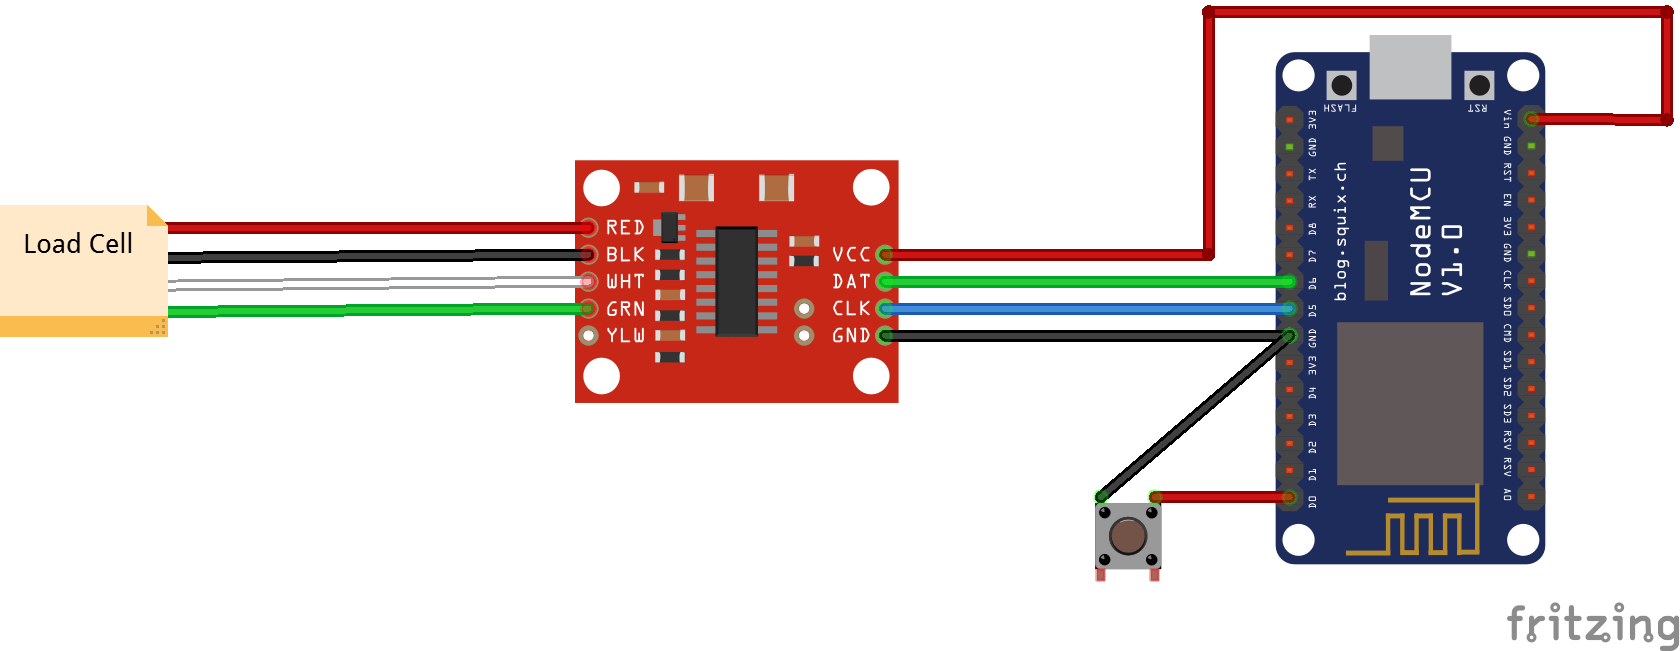
Wiring

Code
For this code I modified and merged a MQTT and HX711 example code. I opted to include some custom calibration functions and kept the origionl tare button’s functionality. Also when the scale is bring tared, the built in LED turns on so you have visual confirmation that the scale is being tared.
In the code the topic the ESP is subscibed to is “HX711cal”, you can change this to the topic of your choosing.
Here are some of the commands you can send to the ESP through the topic “HX711cal”
- “tare”-turns on the built in LED, tares 5 times, and turns off the built in LED
- “+0.1” adds 0.1 to the calibration factor
- “-0.1” subtracts 0.1 from the calibration factor
- “+1” adds 1 to the calibration factor
- “-1” subtracts 1 from the calibration factor
- “+10” adds 10 to the calibration factor
- “-10” subtracts 10 from the calibration factor
- “+100” adds 100 to the calibration factor
- “-100” subtracts 100 from the calibration factor
The ESP publishes data from the HX711 to 3 different topics.
- “Scale1” – the rounded weight
- “Debug” – the full float value of the weight
- “HX711calfactor” – the calibration factor for the HX711
You can also connect via serial to the ESP and in the serial monitor there should be a list of instructions on how to modify calibration constants and tare the scale. The baud rate of the serial communication is 115200.
Remember in order to connect the ESP8266 to the computer via USB you must first hold the FLASH button and then connect it to the computer.
Update 12/19, code modified to include OTA update capabilities. More information can be found here.
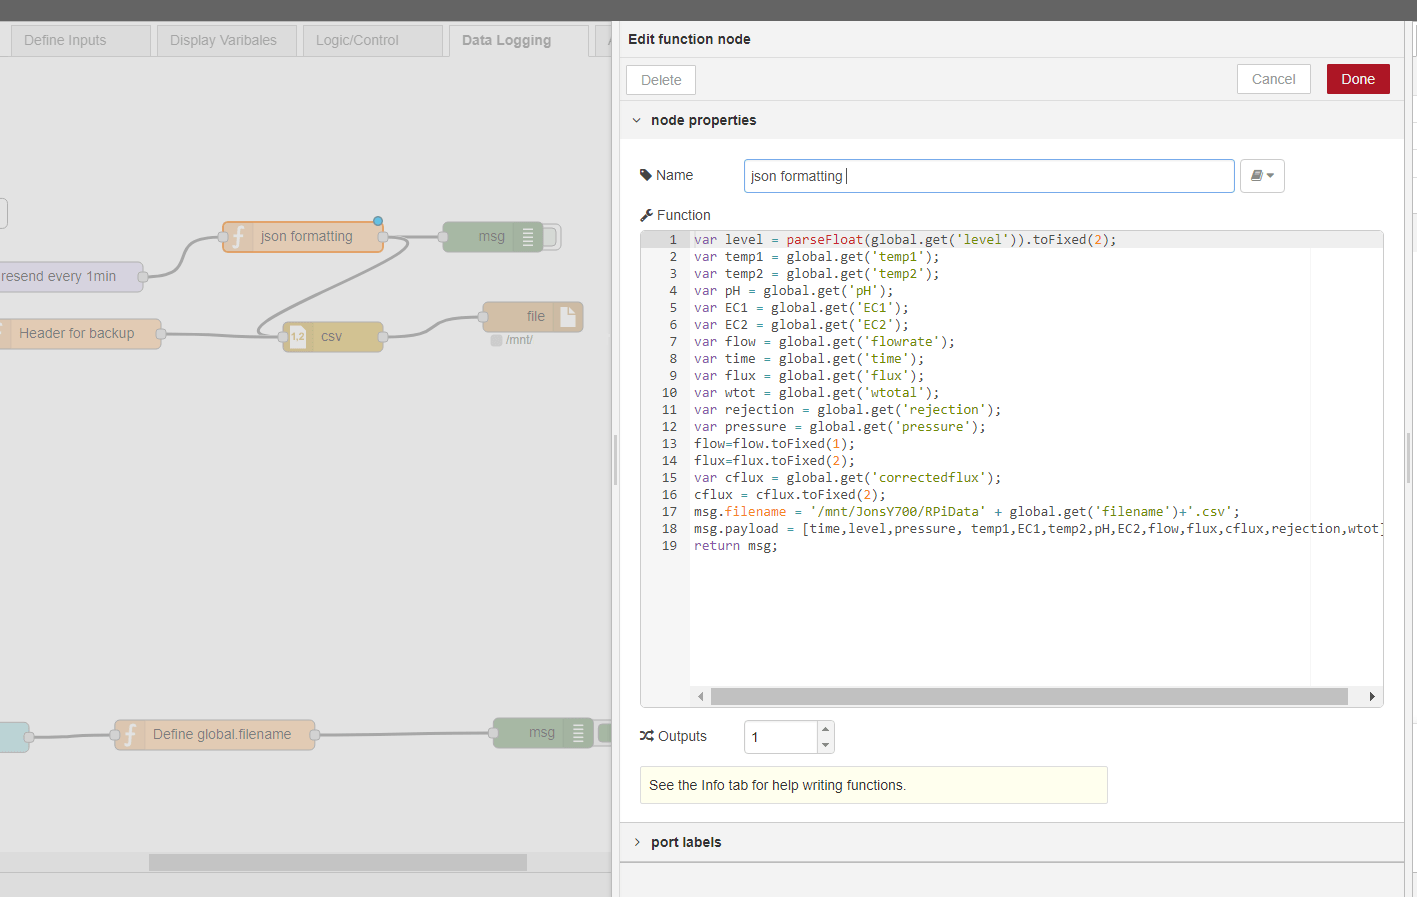
Receiving the Messages and Calculating Flow
To do this I have a Raspberry Pi running NodeRed, see my other post, DIY Raspberry Pi PLC and Sensors for Process Data Collection and Control, for more information. The key nodes you will need are MQTT node, rate node, and UI nodes.

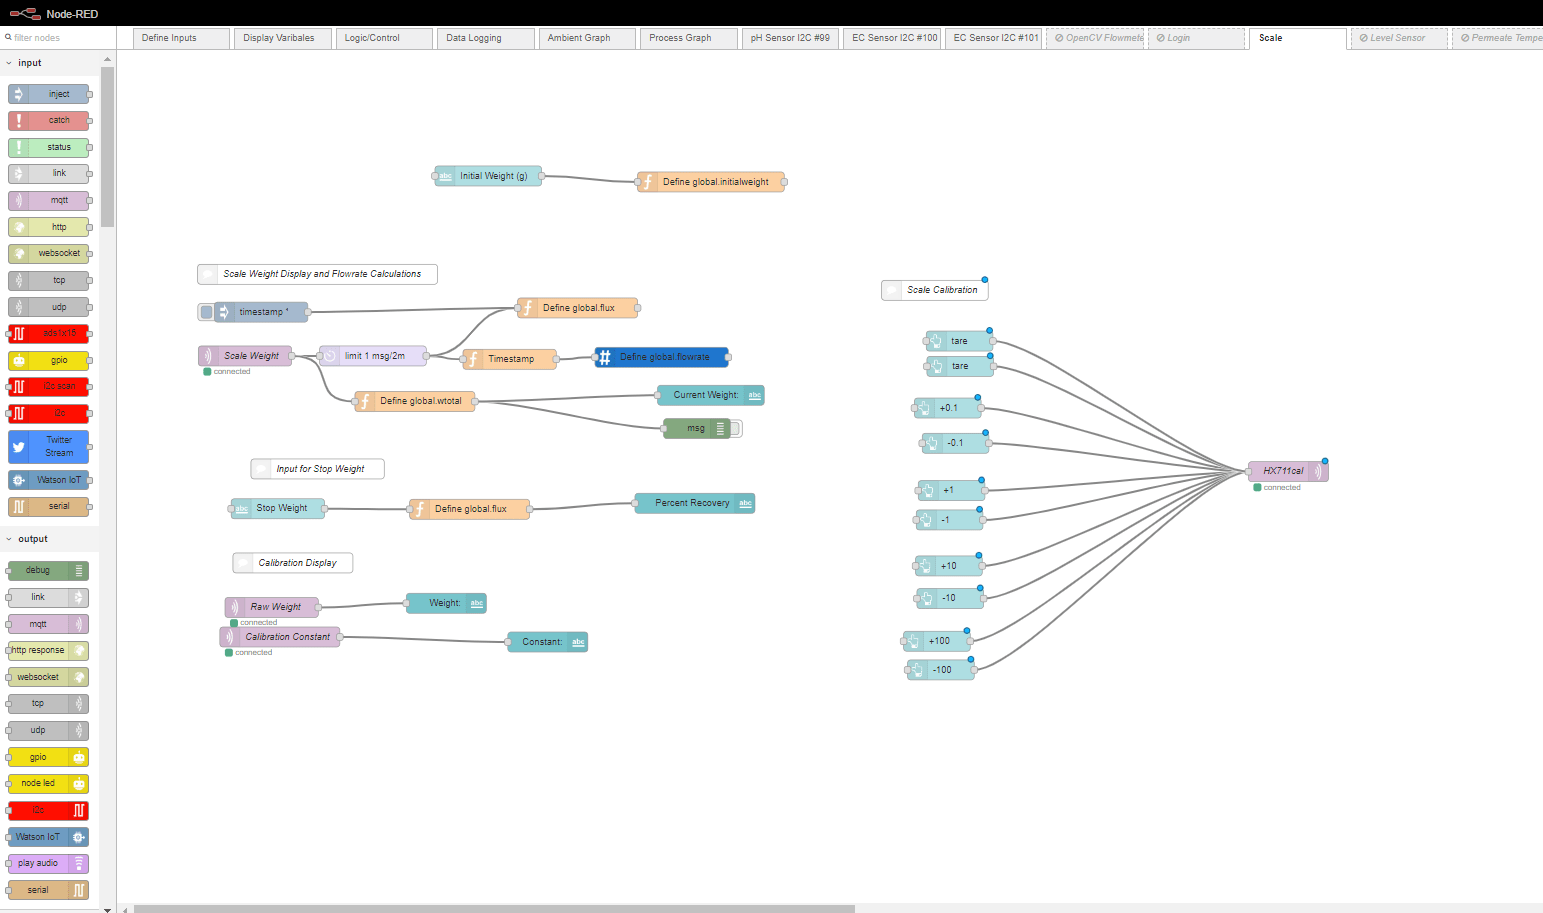
The key to calculating a rate is the rate node. As you can see above that the weight from my ESP8266 MQTT topic is limited to 1 message ever 2 minutes. This message then goes into a function node.
msg = {

payload: msg.payload,

timestamp: Date.now()

};

return msg;
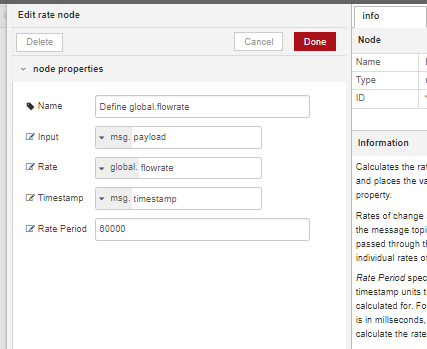
In order for the rate node to work you must give it a reference time. Below are the settings for my rate node.
msg.payload is the instantaneous value I want to find the rate of change of. In this case its the scale weight.
global.flowrate is the outputted rate that is set as a global variable so all nodes can use it as a variable.
msg.timestamp is the time stamp I have added to the message with the above function node, this is so the node knows how much time has elapsed.
Rate period is set to 60000 miliseconds which will out put my rate with the units per minute.

Above you might have noticed the some UI nodes basically those are to send a certain messages to the MQTT topic HX711Cal.
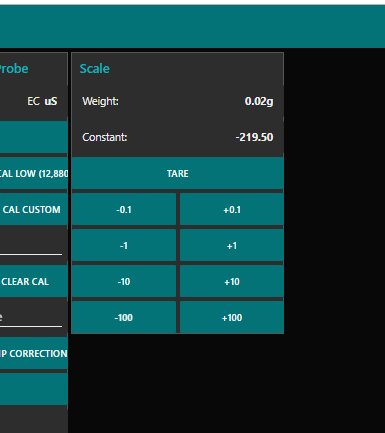
Below is what the calibration UI looks like, it shows the current weight of the scale to 2 decimal points, the scale constant, and has buttons to tare the scale as well as add or decrease the calibration constant.

I will add a tutorial for how to configure nodered and UI later.


This Post Has 3 Comments